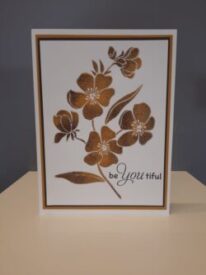
Embossing Powder finish
Kit List
- Choice of stencil
- Translucent Medium
- Heat gun
- Brush for embossing powder
- Embossing powders – I like to mix it up with about 4 different colours
This is how we are going to achieve that amazing embossing powder finish. First shake all your embossing powders this helps mix them and loosen up the powder then open and put to one side.
Apply translucent medium over the stencil and scrap excess back in pot … remove the stencil and place dirty stencil in the water bowl ready to clean later.
Place your pasted image on a spare piece of paper to catch the excess powder, take your embossing powders up on a large brush and tap and sprinkle all over your project, be sparing as the mix needs to be used as well, I always tap off and keep applying the mixed powder until well covered then place embossed powder image to one side and allow to air dry.
Drying time depends on how large and solid the medium is and room temperature, when the image is dry warm up your heat gun and gently heat from the back of the card then move to the front to set the powders .. be careful not to get to close otherwise you will burn the card and medium.
*** If you heat the image while wet, the medium will bubble and rise as well as the embossing powder but this gives you a different type of beautiful textured look.
Your project is now ready to Matt & Layer or frame.
Top Tips
Ensure you sprinkle your embossing powder on as soon as you remove your stencil you only have an open time of a few minutes before skin will form.
If you do not have any embossing powder mixes then mix a few together to create unique colours.
You can do the same with glitters if you want a different look.
Visit our YouTube channel to see how effective this is and much more.