Heat Foil Technique
- Stencil
- Sweet Poppy stencil dimension medium
- Hot Foil
- Anti-static bag
- Laminator
Step by step process
Heat foil technique using the Stencil Dimension medium – (I like to use translucent but any Sweet Poppy stencil dimension medium will work for you).
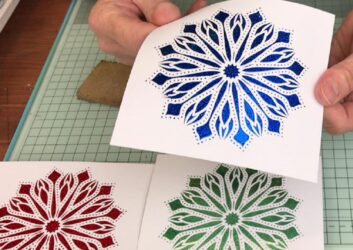
Paste your image through your stencil remove the stencil and pop the dirty stencil into water and then place the image somewhere to air dry.
Once your pasted image has dried, we are now ready to continue with the heat foil technique… we do recommend that you foil your image that day or within 24 hours of it being pasted.
You are going to gently anti-static around the edge of your image on the naked card (not on the pasted image) this will help stop any excess foil sticking to your card, don’t worry if you get a little residue on your card a sand eraser is great for getting this off.
Turn on your laminator to warm up!
Cut your foil to size to cover your image and place it over the pasted area shiny side facing up, place the covered image in between a piece of folded copy paper this is your carrier sheet now feed it into the laminator.
Once the image has passed through the hot laminator open the paper and peel off the foil… this will now reveal your foiled image, if you have any little bits still stuck on the card then use your sand eraser to gently rub them off.
Your creation is now ready to mount or frame.
Top Tips:
- Ensure you use Heat foil and not cold foil.
- Ensure your laminator is warmed up
- Always foil your pasted image that day or within 24hrs.
Just visit our YouTube channel and see how its done plus many more inspirational techniques.