Mica Powders – Polished technique
Product required :
- Gold or Pearl White Stencil Dimension medium works best
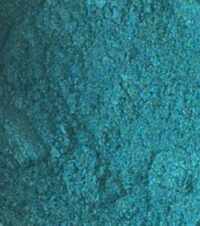
- Sweet Poppy Mica Powder
- Snout nosed Heat Gun
- Anti-static bag
- Large brush for cleaning
- Stencil & Cardstock
Preparation :Firstly, anti-static your card stock well. This will stop the mica powder from sticking and help you get a clean finish.Take your stencil and place it in the center of your card. Secure it in place as usual, using your magnetic sheet and stencil tape.
Application: Using the gold or pearl white Stencil Dimensions medium these work best with the heat. Apply the medium and then remove the stencil and place in a bowl of warm soapy water to clean at a later stage.
Use Of Mica: Place your freshly pasted image onto a piece of spare paper or kitchen roll to catch the excess mica powder. Take a small paint brush and scoop a small amount of mica powder out of the pot. Now gently tap the brush so the mica randomly sprinkles over your pasted image. I like to use a few colours very randomly so I get a beautiful mix of colours at the end.
Lift your image and gently tap it so the excess mica powder falls off onto your piece of paper. Use the excess to fill in any gaps you may have missed on your pasted image. Repeat this with the colours that are on your table until you are happy with your image… you won’t need to use much mica powder!
Give your image a good tap or flick over a bin to get all the excess mica off, place to one side and allow to completely dry… (drying time depends on size of image and room temperature).
Once completely dry place on a clean dry cloth and brush off all the excess with a large brush. Take a soft dry cloth and give the image a good polish this will also give your image a beautiful shine.
Top Tips:
Try mixing different colours on the project to give you a multi coloured finish.
Don’t forget to visit our YouTube page and learn how to incorporate mica powders in lots of craft disciplines.